Showing posts with label photography. Show all posts

Friday, October 7, 2011

Moving off Auto


There is so much information on digital photography on the web, it is fantastic. It can also be overwhelming, when you are a beginner. Where do you start?

I thought I would take a moment today to talk about Digital Photography Basics, an online course I'm teaching starting October 16. I've mentioned registration is open but I haven't talked much about the "why" behind this course on the blog. 

It is no secret that I love the creative aspects of photography. I love to study composition, and why a photograph works visually. I love exploring how to express myself through my images, and helping others do the same. Underlying all of that, there is a technical foundation that I build on. I couldn't express myself in the way that I do without having a good understanding of how to use my equipment. Exposure and post-processing are just as critical as composition for that expression, look at today's photo as an example. The technical and creative aspects all work together.

That's where Digital Photography Basics comes in. The technical foundation you need for expression is not as complicated as you might think. There are some basics you need to understand about how a digital camera works, and how you can use that basic information to create better images. It doesn't take expensive cameras or complicated software to create great images, it takes your unique vision and an understanding of the camera and software YOU have. This course helps you learn to use what you have better, whether it's a point-and-shoot or a dSLR. It takes you off "auto" so that you can express yourself in new ways in your photography.

Here's what past participants in this class have said:
"[My favorite thing about the course] was the simplicity of the technical information. There was no confusion - just straight forward... here's the info of how and why, set your camera like this, go play. Perfect!"  
"I loved learning about the technical aspects of photography. I'd always found it challenging before but you presented it in an easy, understandable way. I loved that you paired each lesson with photographs. That made everything so easy to grasp."  
"You really do have an artist's eye and a visual way of presenting the information, yet with the thoroughness of a scientist... both of which I appreciate." 
I especially like that last one... I think this course may be where my artistic side and my technical side truly do come together. As an engineer for my "day job," Digital Photography Basics is the place I bring that "techiness" to my classes. For me, the technical aspects of photography are secondary to the artistic aspects, but only because I understand the technical part enough I don't have to consciously think about it. It takes a little bit of time and study to get to that point. You can get there too!

If you are looking to get to "move off auto" and get a better understanding of the technical side of photography, Digital Photography Basics is a great step for you to take. I'd love to have you join me! 

Friday, September 9, 2011

The Gender Gap in Photography


A few months ago I realized there is a gap in photography. A gender gap. What started this realization was reading this article on the top 20 most influential photography blogs. I noticed that they were, 19 out 20, men. The one woman was a wedding photographer, a type of photography I did not have much interest in. I was shocked. Where were all the women?


I mean, here in my corner of the internet, I see mostly women. Most of my blog followers and online friends are women. Most of the blogs I read and photographers I look up to are women. I learned most of my photography skills from women teachers. I came to photography from scrapbooking, an overwhelmingly female-dominated craft. In my world-view, photography is dominated by women.

I looked around a little bit after reading that article and realized for the first time, that yes, in fact, photography is dominated by men. I was surprised at first, until I realized that so much of what is written out there about photography doesn't appeal to me, and isn't about what I value. If I visited those blogs before, they didn't capture my interest enough to come back, no matter how well-known they were. Either I don't connect with their writing or their topics. I'm happy that many of these blogs exist, because when I go looking for information on a subject, I can find it. As far as ongoing reading goes, I'm interested in the art of photography. The expression of heart and soul. The connection to other creative people.

I bring this up because I met a new photographer friend for coffee today, and he suggested I look into proposing an article to a magazine he reads. Since I love photography and writing, it's a perfect combination, don't you think? Funnily enough, I found myself quickly rejecting the idea. I immediately thought I would not have something to share with a wider photography audience. I joked with him about how the average guy photographer would react to my Find Your Eye classes. "You mean you want me to journal about photography? You're looking for a connection to my heart? You've got to be kidding." We both chuckled.

Now, there may be some truth to that statement, when speaking about the stereotype. The gender gap, to me, appears real. But I was already rejecting myself before giving the idea serious thought. Why? I have gotten comfortable in this little corner of the internet, and with people who have a similar approach to photography. I'm realizing my view encompasses a very small space in a much, much bigger place.

It seems like a wide chasm out there. I'm wondering how to bridge the gap.

Friday, March 18, 2011

Super Moon


Tonight's full moon will be a "super moon" - the moon will be closer to the earth than it's been in 18 years, making it appear larger and brighter. I captured this photo last night from our apartment balcony, the first time I've ever tried to capture a good moon image.

I followed the instructions in this wonderful Muse University post about capturing the moon, written by my friend Barbara. In addition to her tips, I also found that turning the Image Stabilization off, using manual focus and a shutter remote helped. You can use the self timer on your camera if you don't have a remote. This image was captured at the maximum focal length (zoom) I own, 300mm, and was still not as clear as I would have liked. I had to crop quite a bit to get this composition. It's the first time I have ever wished for higher zoom. :)

If you've never tried it, tonight is a great night to "shoot the moon." Or, if photography is not your thing, take a moment to enjoy gazing at the super moon this evening.

Sunday, February 20, 2011

Mystery Revealed


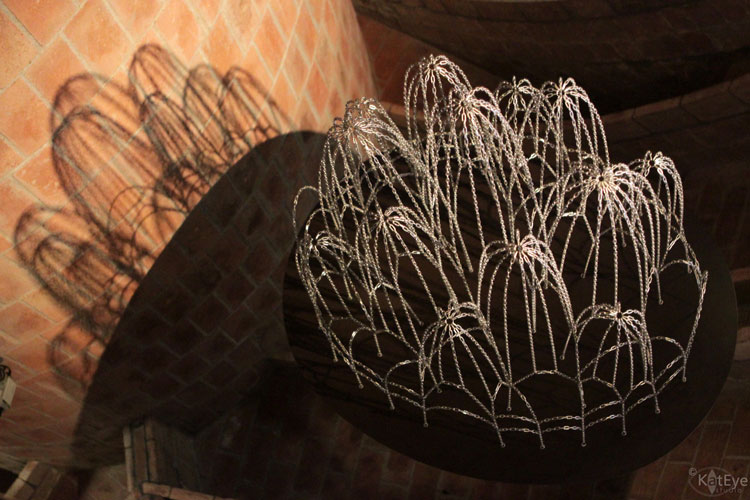
As I went back in time in my photo file to find an image that would reveal yesterday's mystery, I came across this photo of the ceiling in the Gaudí designed Casa Batlló. Actually, I came across two photos of this ceiling, and I remember them well. At the time I was editing, there were two different compositions I processed similarly and liked, but I couldn't decide between them. Since I couldn't decide, I just left them in the file and didn't do anything with them. As I reviewed these images yesterday, this specific composition jumped out at me as being the more interesting of the two. It was absolutely, crystal clear in my mind. Why had I had such a debate long ago?

This is a great example of how we grow and change over time. My style and eye has been refined since I worked with these photos eight months ago, and I have a different response to the images from that time. I see the world from a new place, a shifted perspective. Have you ever gone back in time, and discovered wonderful things in your old photos? There are many gems for you there, I guarantee it.

No one was able to guess what yesterday's image was, and I'm not surprised. It was a bit abstract, and requires a little bit of a history lesson around architect Antoni Gaudí. Gaudí was inspired by observing the world around him, and the catenary arch is one example of this philosophy that you can see in many of his designs. A catenary arch is the shape that a chain or rope will make when at rest, the forces perfectly balanced. When you turn this shape upside down, you have the shape of a very strong arch for building.

The image I showed yesterday is the mirror reflection of a grouping of chains that Gaudí used to design a cathedral. The hanging chains form a series of loops that become arches and domes when viewed in reflection. The whole set up of this exhibit was very neat, with the mirror and the shadow on the wall to help illustrate the concept. Here are is an image of the chains "right side up" to help you see what you were looking at.


Here is yesterday's image of the view in the mirror, in color. A little more context helps you understand what you are seeing, doesn't it? It's amazing how we as photographers can manipulate reality, just by including or excluding context. That's what makes this medium art. We, as the artists, get to decide.

Friday, December 31, 2010

Time Travel


Someone once told me that human beings are the only animals that time travel. We move forward and backward in time unceasingly in our heads. Dwelling on the past or dreaming of the future, we barely glimpse the present moment.

This time of year is big for time travel. Reviewing our accomplishments of 2010, we are astonished that another year has passed. We look to 2011 as if it is something shiny and new, a package waiting to be unwrapped. Really, 2011 will be another collection of moments, strung together in time, just like 2010 has been. There is nothing special about these days at the end of one year and the beginning of the next, they are only numbers on paper. A way to mark time.

Where have you been time traveling these last few days? What have you seen in your past and your future? I hope for today you spend some time celebrating the present moment. Because that's all we really have, when you get down to it. Our ability to time travel is just an illusion.

Today's 9 Muses Musing prompt is CELEBRATE. Tomorrow's prompt wraps up 9 Muses Musing with RESOLUTION. See you then!

Photographic PS - The "time travel" image above was created by setting my camera to a 1 second exposure, and then zooming from max to min focal length during the exposure. You can see it was handheld because of the wiggly lines, if I had been using a tripod they would be straight. I got this idea from my friend Barbara's post on lights, but when experimenting I found I really liked the effect with people. Below is a normal shot of the same place, the Galleria Vittorio Emanuele II in Milan. Which do you like better?

Thursday, October 7, 2010

Exploring with a Camera: Photo Essays


In the last year I've explored a vast range of art and photography. Visiting galleries, taking online classes, searching out photography blogs, looking at Flickr. What I've found, in all of that, is that my enjoyment of art, and especially photography, significantly increases with understanding of the back story... either the story of the artist or the story of the subject. It gives such a wonderful insight into the artwork that has been created, it's like an additional dimension to the art itself.

I think that's why I blog the way I do, and I'm attracted to other blogs with wonderful imagery and words. I want the story behind the image, along with the image. I connect with it in a deeper way, and I want you to find that here as well.

So today for Exploring with a Camera I want to talk about Photo Essays - which are beyond even what I normally do on my blog.  Yesterday's post Camaraderie of Beer on Oktoberfest is an example of a photo essay, or my earlier post The Story of the Rooftops on Dubrovnik. There are times that a story needs to be told, and it takes more than one photo and a few sentences to tell.

You might ask, isn't just a regular blog post, with several photos and text, a photo essay? Maybe, maybe not. I've read a lot of blog posts, but only a small few that I would categorize as a photo essay.  Two that stand out in my mind are Kirstin's post Where I Live on the Mortal Muses More Musing site, and Patty's post The Down Side on her blog, Nomadic Notebook.
A photo essay takes a few photos, combined with words, to tell a specific story of a time, a place, an experience, a piece of history. It has impact. It is basically photojournalism, but with a personal twist, by my definition. While you want to convey the information, you also want to convey the feeling you might have had. Why the story or experience is important to you, why you felt it needed to be told. In a photo essay, you focus on a specific point with your photos and words. Every photo tells a piece of the story, every word needs to be there. It's not just the best photos of the day, but the ones that are needed to support the story.

So, how do you go about creating a photo essay? Here are a few tips:
1. Decide the story you want to tell. Be specific for the best impact. For example, I didn't want to try to tell whole the story of Oktoberfest - that's too big for just a few photos, I would lose the impact. So I took one aspect I noticed, the camaraderie in the beer drinking, and focused on that.
2. Choose your supporting photos. In some cases, you might have the idea in your head as you take the photos, which is what I did for my Oktoberfest essay. In other cases the story might develop as you review past photos, which is what happened for my Dubrovnik essay. Go through your photos, pick all of the ones that seem to apply. And then narrow down. Narrow down again. Make sure that each photo is essential to the story you are telling - try to get it down to 3 to 5 photos if you can. As I mentioned above, pick the best photos for the story, not just the best photos of the day. If they don't help tell the story, save them for something else.
3. Write the essay, inserting the photos. You might find that you have to switch them around from your original idea slightly or you need to choose a different photo for the story to flow. That's ok!  It doesn't have to be long, just get the main story written with the photos inserted.
4. Edit. Step back and read it, making edits. Read it again. Take out anything that doesn't flow or support your point. It might be a great idea or photo or brilliantly written sentence, but it has to fit the story. Do with your words what you did with your photos - narrow down.
5. Publish! Share that photo essay with the world. The world needed to see it, or you wouldn't have had the idea in your head. If you ever see or feel a story that needs to be told, follow that urge to conclusion and then see what comes back. You just never know!

Not so many photos today, but I hope that this post has inspired you to look at how you can combine your images with words to great effect, or to notice how others create an impact using the photo essay. Come back next Thursday to share your view and link in to any photo essays of your own, past or present. Or link in to ones that you have found on the web, that have impacted you in some way. You can post your photo essay images to the Flickr pool too - I'll be watching for them there!

Note: This post is part of the Exploring with a Camera series, published every two weeks. See all past exploration topics here.

Thursday, September 23, 2010

Exploring with a Camera: Night Photography


Welcome to the last day of Six Days of Night! If you don't have the bug to try night photography after this week, then I'm not sure I'll be able to convince you. But if you do have the desire to try it out for yourself, today I have some information that will help get you started.

I discovered night photography about a year ago, in October 2009, on a trip to Florence and Tuscany. I'd taken the odd night photo here and there before this, and some even came out great, but it wasn't until we began travelling in the winter months last year that I really fell in love with it. When you travel in the summer, you have these long days to run around and see everything. By the time the evening comes along, everyone is worn out and you head back to the hotel room as the light fades, especially if you have kids. In the winter, however, the days end early and you find yourself out and about in the darkness, seeing the world in a totally different light. Amazing, beautiful, atmospheric light that is like no other. And just like the quality of light in the daytime, which changes from place to place, the quality of light and atmosphere of places at night changes too. You've probably noticed that in the photos I've shared over the last few days.  The photo above is one of my first attempts at night photography, in Florence.

My definition of "night photography" covers a broad range of light. As soon as the sun goes down and the lights start coming on, to me that begins the night. This is the time that the flash would start automatically coming on in your camera or you might just put it away, if you are used to using natural light.

Let's look at how light progresses from day to evening. This image of London is from very early evening. You can see that the sky is still quite light, but the phone booth is lit, the streetlights are on and the windows are starting to glow with light. There is still a lot of light at this time for your photos, but you start to get the warm glow that makes night photos something special.

The transition from day to night is called twilight or also the "blue hour" because you see the sky transition through a wonderful range of blue. The contrast of this blue sky with the warm yellow of artificial lights is especially pleasing, as in this photo from early evening in Split, Croatia.

Toward the end of the  "blue hour," the skies are an amazing deep blue, as in the photo below taken the same evening in Split, just later. The blue also changes as you look toward the west, where the sun just went down, versus toward the east. You can see the variation in blue in the sky of this image below, from bottom right to top left. I can't image a prettier blue color! No color adjustments done to this at all.

After a while, you will find yourself in full night, where the background skies are black. This has a completely different feel in the photo, all illumination is from the artifical lights around, as in this photo of Piazza San Marco in Venice.

Guess what? The blue hour happens twice a day, before dawn and after sunset. There is a great website, bluehoursite.com, that gives you the times of the blue hour for anywhere in the world on any day, so you can plan ahead!

Now that we've talked about light, let's talk about how to use it creatively at night. There are so many ways to photograph the night! Looking through my photos last week I came up with lots of ideas. To start off, you know that reflections are one of my favorite things, whether the smooth as glass reflection of my favorite Venice photo (I had to slip this one in!), or the ripples of the bay in Split.


Reflections don't only come from a large body of water at night as I've shown above. The pavement of the sidewalk, streets, rain... at night there are unending sources of light reflections. Not only are they cool to capture, but they increase the light available for taking photographs. Keep your eye out for them! We had a rainy night during our visit to Bath, and the reflections were so interesting. The really highlight the stone walkways and streets.

You might also note how yellow the light looks in the above photo, I did not do any adjustments to white balance to change how it came out in the camera. In my night shots I like the yellow glow of the lights, because that is part of the feel of night for me, although sometimes I do tone it down just a bit. You have to be careful when you adjust white balance on a night shot, because you can make the image look weird. The image below is an example. Left is out of the camera (quite yellow), Center is the color correction I like (still slightly yellow), and Right is over-corrected (no yellow left at all). While the flowers are white in the right one, that adjustment ends up creating an overall blue cast to the photo, and it no longer looks quite like night.

Night is a time for wonderful light bokeh. Since you often need to shoot with a wide open aperture to keep shutter speed down, you can capture the bokeh of lights in the background. This photo of the Chapel Bridge and the Lucerne water front is a good example. Since I've focused close to me, on the bridge, the waterfront behind is out of focus with nice bokeh. I've decided that I don't use this effect enough, I need to play with it more in my night shots.

Watch for light pools or effects. Some of the paned windows in York provided wonderful shapes of light on the ground. I would love to go back and focus some shots just on those!


Night is also a wonderful time for silhouettes. Either from the fading light of twilight, or an artificial light source. The silhouette of the person walking by the bookstore in Padua, in the shot below, gives interest to the colorful background. And the strong light coming out the store front made this easy to get.

Strong light can also create shadows, sometimes in multiple directions at once if there are multiple light sources, like in this photo of my son's legs and feet. Pretty cool! You don't see this in the day, since we only have one sun. :)

Another great thing to capture at night is motion - in the form of blur. Because of the longer exposures you need, moving things will be blurred in your frame if the camera is still. You can also try to capture a moving object as still, with the background blurred to show motion, if you pan along with the moving object. This takes a lot of practice and trial and error. I don't have any great examples of this, although I've tried, but the photo below from Venice shows the idea. I was on a moving boat, trying to get the bridge over the canal still while the rest of the photo was blurred. More practice is obviously needed, but hopefully you get the idea.

Sometimes, when you have just gone beyond the limits of any clear, in focus shot, just play. The photo below is from that same Vaporetto ride in Venice. Since I was moving on the boat, I played around with longer shutter speeds and intentionally moved the camera to get some cool effects. Kind of neat how the background buildings are still clear and "still" while the bright lights are moving - completely unplanned.

And finally, don't be afraid of the dark. This is night, you can have large areas of your photo completely black and still have an amazing photo. Throw away the idea of the the entire frame being exposed when you are shooting at night, and just go for your focal point. It can create a dramatic image, like this one, another all-time favorite of mine from Venice.

My main mode of operation is to handhold my camera for night shots. I just am not willing to haul a tripod around with me all day so that I can have it handy at night, so big and cumbersome. So I've learned quite a bit along with way that I can share with you for optimizing your ability to get good "Handheld" night shots. (By the way, these will work in any low light situation, such as indoors, not just as night.) Tips for "Handheld" night shots:
  1. First off, turn off your flash! Turn your camera to a mode that won't allow the flash to come on.
  2. Camera shake is your biggest enemy here - just the movement of you holding the camera while the shutter is open. A rule of thumb to avoid camera shake is that the shutter speed should be no slower than 1/[Your zoom setting]. So if you are at 50mm zoom, your shutter speed shouldn't go below 1/50. At 35mm, shutter speed of 1/30.
  3. Increase your stability by taking a wide stance with your feet, tucking your elbows tight into your sides, and hold your breath while you take the shot. I can sometimes get good shots down to 1/20 or 1/15 with this method. You can also lean against a pole or the side of a building for increased stability.
  4. You can also increase your stability with an "assisted handhold" - use anything stable around, like a railing or bench or fence, and use that to help hold your camera. I put my hand under the lens, spreading my fingers and moving them around, to support the camera with the right angle. I also have to plan for more straightening and cropping in these shots, because you don't have as much control. Most of my Venice canal shots were done with the assitance of a bridge railing for stability. Another option that is less cumbersome than a tripod but provides more stability is a monopod.
  5. Set your camera on Aperture Priority, with the setting as wide open as it will go. This will help keep your shutter speeds as fast as possible.
  6. Or, set your camera on Shutter Priority, to a reasonable shutter speed. I often do this to set it at 1/50 when we are just walking around a town. I've found that this setting works consistently well for avoiding camera shake on the go, and it forces the camera to choose the best aperture for the exposure. This works when my camera is choosing slower shutter speeds but not using the full aperture range of my lens.
  7. My last resort is to bump up my ISO setting. This is one of the most wonderful things about digital, that we can adjust our ISO setting, instead of being stuck with whatever is set for the film that is loaded. When you're wide open on aperture and your shutter speed is still too low, then increase the ISO setting. I kind of think of ISO increase as a last resort, because with every increase to ISO you also increase the noise. I purchased my current camera (Canon Rebel T1i) partially because of the increased ISO range, 3200 and beyond, but the more I've gotten into night photography the more I realize that I would rather not use the ISO settings higher than 800 if I can avoid it. But - when faced with either not getting the shot or having a noisier shot - I'll always choose to get the shot, even with the noise.
  8. If all else fails, underexpose. By underexposing, you can drive your camera to shorter shutter speeds. As long as you don't underexpose so much that you lose the vital pixel information of your focal point, you can compensate exposure in the computer using software.  I've learned that I can easily underexpose 2/3 to 1 full stop on night photos and recover them in post processing.
  9. Constantly check your settings, especially shutter speed, if your camera is in an auto mode for exposure. You have to be aware of them as you shoot at night, even more so than you might normally, because the lighting conditions change so much from place to place.
  10. Always take multiple shots, because with several you might get one that one perfect one. There is a lot more room for error with night photography. And happy accidents too! Review in camera using the zoom feature, because sometimes a shot might look perfect on your tiny screen only to have some camera shake when you view it larger on your computer.
  11. Finally, if you just reach the limits of your equipment and don't want to go the tripod route, there is nothing that can help your handheld night photography more than upgrading your equipment for a lens with a wide aperture. Night photography is one area where your equipment really does come into play a bit more, so you will have to experiment and find the limits of your camera/lens combo.When night comes, I switch to my 35mm f/1.4 lens. This has given me an extended range of light I can work with at night. Consider trying out a 50mm f/1.8 lens as an inexpensive first step into this arena, if you have a dSLR. And if you have a point-and-shoot, well... you might want to think about a dSLR or use a tripod.
As I've progressed further with night photography, and especially after my photo lesson in Paris, I can really see the benefit of the tripod. You can decrease your ISO and increase your shutter speeds significantly and take your camera limitations mostly out of the equation. The cost of it is carrying the tripod, so for me, I see this as an option when I am intentionally travelling to photograph rather than when I photograph as I travel (the latter is my normal mode of operation). Tips for "Tripod" shots:
  1. You need a good stable tripod that will not move with normal winds and can hold your camera. My 24-70mm lens is a big one and so most of those little, compact tripods you can buy won't work for my camera. Also recommended with a tripod are a quick release feature (where you don't actually screw the camera into the tripod, but into a piece that you can easily connect and disconnect from the tripod) and a level that can help you keep your camera straight (something I need!). There are multiple types of adjustments available, but you want to make sure that you can do both horizontal and vertical orientation easily. There are so many types of tripods out there, if you can visit a store and try them out with your camera before you buy, that is recommended. I have a simple tripod that is strong enough to hold my camera stably, has quick release, but is as light as I could manage.
  2. Ensure flash is off.
  3. Set your ISO lower, to reduce noise. Try as low as the camera will allow you to set it, and work up from there as needed.
  4. You have more flexibility in your aperture and shutter speed settings, so play around here. You might still want to set your aperture wide open, to reduce the shutter speed, just to avoid really long exposures you will need for a low ISO setting. You are still subject to camera shake with a tripod, just less so. The longer the shutter is open, the more likely you are to have an issue.
  5. Use a remote shutter release. You can still shake the camera on a tripod just by pressing the shutter. Remote shutter releases (cable or wireless) are available inexpensively for many cameras. This removes you completely as the source of the camera shake.
  6. Use your camera self timer. Another option, if you don't have a remote shutter release, is to use the self timer feature that most cameras have these days. This doesn't work so well, however, if you are trying to time the shot with movement in or out of the frame. For example, in many of my Paris shots, I had to be ready to shoot as soon as my frame was clear of people. If I used the self timer, I could never have been able to hit the shutter such that 10 seconds later the frame was clear.
  7. Again, review, check your settings and take multiple shots. Once you get everything set up perfectly, you don't want to be disappointed if you discover on the computer that it was slightly out of focus. It's hard to use manual focus at night, so I use auto focus as much as possible but that isn't always fool proof either.
If you stuck with me here to the bitter end you must be ready to start exploring night photography. And guess what - here in the northern hemisphere the days are getting shorter and the nights longer, so you'll have plenty of opportunities in the coming months. The Flickr group is available to post your shots, but I think I'm also going to mix it up a little bit to see if I can increase the sharing. Next week come back on Thursday and you can add a link to your night shots (blog or website or Flickr, anywhere with a web address to your specific shots) to share with the rest of the readers here too. Won't it be fun to go blog hopping and see what everyone else has captured in the night? I can't wait to see your view!

Saturday, September 18, 2010

Six Days of Night: Paris


I got so many comments on my Night School post, wanting to see more pictures and hear more about what I learned from photographer Molly S.J. Lowe on my night photo tour in Paris, that I am following up with much more information today. This post is going to kick off "Six Days of Night," where I'm going to post night photos from the different places we visited this summer, and finish up with an Exploring with a Camera post Thursday on night photography. So come back every day to see more of the world at night, and then join in with some photos of your own in the Flickr Exploring with a Camera group.

The photo above is one of the photos I "saw" on my own, set up and got right in the camera. This was one of my absolute favorites from the night. I'll show it again in the sequence below with more comments, but I wanted to feature it as my "eye-catching" photo of the day. So, if you want to learn some more about night photography and what I've learned through this experience, read on. Otherwise just scroll down and look at the pretty pictures. :)

All of the photos below are straight out of the camera, in sequence they were taken. This isn't all of the images I took, by any stretch of the imagination, but I've picked the best of each specific composition and I've provided some details about what I like and what I would change - either in the initial set up or post-processing - based on what I learned from Molly. The key thing I took away from her during our three hours together is to get it right in the camera, so you have to spend less time post-processing and more time shooting. (She shoots mostly film, so obviously this is even more important in a film situation!) "Getting it right" includes getting the image level, appropriately framed (checking the edges), focus, exposure. Beyond just basic composition, these are the details that can make or break an otherwise good shot.

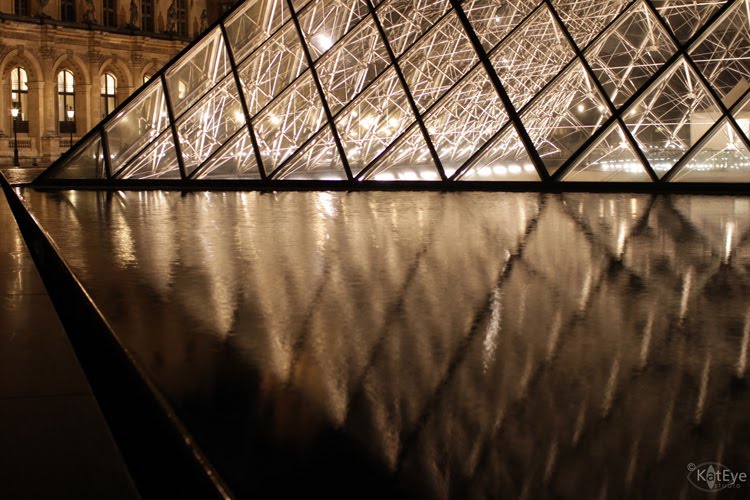
We spend quite a bit of time at the Louvre, because I mentioned I was really was drawn to the pyramids in contrast with the classic Parisien architecture. This shot Molly had me set up, and we worked on framing. Exposure was set to capture the interior of the passageway, the camera was set to aperture priority with the aperture wide open, and I was using a tripod. I notice a couple of things I would change: For one, the front pyramid is not perfectly aligned to the back one, the camera is slightly off of center. I would also try to capture the tip of the ceiling curve that is cut off, by backing up just a bit. Neither of those things could be corrected in software, so I needed to see those at the time. It also needs to be centered, with even edges left and right, but I could correct that in the computer. The centering and framing was an ongoing problem I had during the evening, because what I see through my camera viewfinder (Canon Rebel T1i), is smaller than what the sensor actually captures. Not only that, it's not even on all sides. Good to know!

We moved closer to the same archway, to get the building behind the pyramids framed in the arch. Exposure was set for the pyramids and building behind, so the archway and corridor was more in silhouette. Still a little off center with the camera, you can see that in the tip of the front pyramid and the space between the chimneys of the building and the edge of the arch. Also a little uneven left to right, I would crop that evenly. This image feels a bit more "mine" because I saw the photographer there and took the shot with her in it. In general, we were waiting for people to move through and on, and didn't always get the shots desired because there were a lot of people around in the evening (she thought more than usual).

To avoid the people issue, this one is zoomed in. Still slightly off center and there is a little more archway on the left than the right, but overall a nice shot and I like this one. Notice how the light is changing from the first image to this one, you'll see the progression into full dark through the sequence. Kind of cool to notice how the light changes with time by viewing a sequence like this.

In this one, Molly asked me to set up something with the two pyramids and the building visible behind. I like this image for the beautiful blue sky, and the diagonal line that the top of the pyramids and building make from left to right. We never were able to get it without people, even after waiting and waiting and also trying to zoom in closer. So we moved on. The light was not waiting for us. Another good point - sometimes you just can't quite get what you want - either the light changes or people are in the way or who knows what else - so just move on. There are other images to be captured!

Molly asked me to set up a shot with these lights, see what I could get. After a couple of compositions and input from her, I think this was the best one. The lights and columns of the building were converging toward the back building, and I like the silhouette of the statue there in the middle. There were a couple of frustrating things that happened in this shot. First, the ghost lights on the left side. We moved around, she shaded my lens, we changed apertures, and could never get rid of it. She couldn't tell exactly where it was coming from. I had never thought of using my lens hood at night (I usually don't carry it), but maybe that would have helped. The second thing, my camera freaked out and would not take the picture at times, it just couldn't seem to figure out the exposure. Moving to full manual helped, but there were a few times the camera just would not release the shutter for some reason. From this point on we moved to full manual mode on the camera for exposure, so that we could minimize this problem.  Moving on...

This was a hard, hard shot to get. Lining up the image left to right was one of issues, which you can see I overcame pretty well by using test shots and adjusting, the other one was focus. Since we were using a wide open aperture, the focus needed to be dead on the front pyramid or the image would look out of focus. The auto focus, even when setting a specific focus point, didn't work very well. Partially because the lowest focus point was a little bit too high for the bottom pyramid, and partially because the light was so low. Switching to manual focus wasn't that much better, just because it's hard to see in the dark how clear your image is, and my eyes aren't as great as they used to be. I have many of this shot with out of focus pyramids. Even with all of that, this one came out great and I really love sky behind the pyramid. Again, couldn't get it without people. Also, one of the lights in the left foreground was out, I would probably photoshop one in just to make it even.

Moved closer, and you can see the light fading...

Moved up close, and you can see the fading light of the sky is completely gone by now. Through all of these I had the trouble with focus, maybe it was also just the structure itself, that with so many windows and lights and planes the camera couldn't get a good focus point. You can see that this is not completely straight in terms of horizon and there is more space on the right than the left, but the front pyramid tip is lined up, so I've improved already! I have another version of this same picture that is perfectly centered left to right, but the pyramid is slightly out of focus. I think with my camera viewfinder-to-sensor offset I would not worry quite so much about getting the perfect framing in the camera, but leave a little bit of space for cropping in my post-processing. That would also help if I need to straighten the horizon, I'll have a tiny bit that I can lose with the cropping that happens when I straighten the image.

Here it is again - my favorite shot of the pyramid shown above. This one came out right in the camera with the first shot - horizon is level, line of the fountain and edge of the window converging at the edge, exposure is good. I might crop at the top in order to get the top left corner to line up with the ledge above the windows, but I'd have to see if that affected the overall composition of the pyramid.  I love the reflection in the water, the ripples from the wind give it softness in contrast with the hard lines of the pyramid.

Molly had me set up several different compositions from this location, where you could see the building behind the pyramid. I wish I could tell you that I saw this myself, but it was really about partway through I noticed that you could see the building behind. Too funny. This one is pretty nicely centered, exposed, etc., but maybe slightly tilted. The only thing Molly suggested was to take out the little fountain piece you can see in the water in Photoshop.

We moved on from the pyramid, here's a quick shot of the Hotel du Louvre. Really cool repitition here, with the rows of windows. This is mostly lined up horizon wise. I haven't mentioned, but with all of the shots we did some initial shots to test exposure and make adjustments as needed. Aperture was generally kept wide open in order to keep the shutter speed down as low as possible. Even though I was using a tripod, I didn't bring my remote (need to put that in my camera bag!) and camera shake from pressing the shutter was still an issue. With this shot, even though the Hotel du Louvre sign is bright and a bit overexposed, this was the best overall exposure. Getting more detail in the sign made the image look dim. This is not my favorite image. First off, there are a couple of lights out, which mars the repitition for me. Can you see them? Second, I would rather be focused in on one or two windows. Isn't the glimpse of the interior enticing? But that's just me...

This is one of the Paris metro entrances, there are such interesting ones here! We started on the other side and then moved around to eliminate some advertising from a newspaper kiosk, that was on my right side when I took this image. Molly also really had me focus on being dead center with the light in the entrance, and I never got the image quite straight as you can see by looking at the top of the stairway. I don't love this shot. The background building is a bit distracting to me, and I would have loved to explore this sculpture up close... the patterns in the fence, the reflections in the giant beads, but that would be for another day.

Here's another one of the fountain, that I showed in my Night School post. We did several compositions of this, and this is one of my favorites that is a bit more wide angle. I would love to have gotten the shot without the taillights of the car. Molly suggested early morning, as there is no one about, as a good time to get images without cars or people or anything. I have noticed in the last year that many beautiful, professional photographs of busy tourist places are taken in the early morning, probably for that reason. You can still get the beautiful blue skies of dawn or the lights of night, but the locations are deserted since everyone in their right mind is sleeping. I just have to get serious enough to drag myself out of bed before dawn! The only other thing I would change about this shot is to straighten it, which I can do in with post-processing.

Here was the final place we set up in Place de la Concorde, looking down the Champs d'Elysee. This was a hard shot again. The bright red or green stoplight, the location and motion of the cars, the exposure/focus on the arch all were difficult. Then there were the lights visible in the image on the hill behind, kind of floating in the sky. We couldn't see them with our eye but they showed up in the image. We played around here for a while, but our time was up at this point. This is my last shot of the night. In my camera review, I liked the streakes of the cars that were driving by, but didn't love it as much when I viewed it on the computer. Molly suggested removing the lights above the arch in photoshop and turning the image to black and white. I also cropped and straightened and...

Voila! Molly was right. I like this image much better.

I hope you enjoyed my photo tour vicariously. This has got to be the longest post I have ever written! Thanks for your request and questions, because writing this post got me to really look closely at the images and learn more from the experience. Join me tomorrow for more of Europe at night!

Friday, September 17, 2010

The Beginnings of Something Beautiful


I was so, so lucky to have a new friend, fellow muse Suki, come and meet me in Paris for an afternoon. She took the train over from Germany and we met as the overcast skies cleared up to sunshine, for a wonderful walk around the city.


This was Suki's first time in Paris, and since it was only my second time, neither of us knew the city well so we just walked and talked and photographed our way randomly around the sights along the River Seine for a few hours. I don't think it mattered to either of us where we were, it was just so wonderful to find a kindred spirit, in person. To find someone else who understood and could talk about our passion for photography, for capturing the perfect moment, for hours. We talked equipment and theory and, most of all, what called to our souls. What subjects and light and ideas that made our hearts sing. What dreams we have. And while we talked, we walked and photographed what caught our eye. We traded lenses, to try out something new.


We could have talked for days, I think. I was so sad when it was time for Suki to head back to the train, one afternoon together was definitely not enough. I am so glad that she came to Paris to meet me, to have a chance to have a few hours where we weren't interrupted by the reality of work and school and other commitments, we could just talk and dream and be who we are - artists with cameras, a passion in our soul to capture the beauty of the world around us.


The images in this post are ones I took during my time with Suki. Pop on over to Suki's blog where she wrote about our meeting, and see her photos too. It is such a wonderful example of how we all have a unique vision of the world to share. We were side by side the whole time but saw and captured dramatically different things. She has an amazing gift, she sees the essence of beauty in everything. I like the "me" I see through her eyes. I am envious when I look at her images, they are so beautiful. But then, I look at mine and see that they just have a completely different point of view. Not better or worse, just different.

The next time you think to compare your work to someone else's, just remember this little story of me and Suki. Two people, sharing a passion for an art form, but from a different perspective. We all have a unique vision to share with the world, whether it is photography or painting or writing or whatever your work is. The creative universe is big enough for all of us to join in.

+ + + + + + +

Today I'm on Mortal Muses, talking about the end of summer. Come by to see how the end of summer is marked in our little town of Vedano al Lambro, Italy.

Wednesday, September 15, 2010

Night School

Last weekend in Paris was about gaining new experiences, seeing what I could learn by travelling on my own. Sunday night I spent time with photographer Molly S.J. Lowe, on an evening photo tour organized through Photo Tours in Paris. Molly is a freelance and fashion photographer, an American transplanted to Paris. It was fascinating to hear about what she does as a professional photographer, and to hear another ex-patriate point of view. Take a look at her beautiful black and white photography at the link above.

Molly was an exacting teacher, wanting me to get the shot right in the camera, rather than relying on post-processing in the computer. Once she learned I knew what aperture and shutter speed were, we focused on the details of composition. I learned more about shooting in manual and choosing the right settings for the look of the photo at night. I learned to look closely at the edges of the frame to see what was going on. I learned that my camera viewfinder is not very accurate as compared to what will end up in the picture - and it's not even symmetric - so getting the shot right in the camera for framing takes some trial and error! I learned that it is difficult to use manual focus at night, but sometimes you have to. I learned the ins and outs of using the tripod to get a good shot. She made me pay attention to the little details, the things that make a difference, and take a photograph from ho-hum to great.

We spent three hours together shooting around the Louvre and Place de la Concorde. Amazingly, in that time I have very few really good shots, and that is just fine with me. We stayed with each shot for as long as it took to get it right, focusing on learning those little details first hand, which is what I needed. And while I have several beautiful shots, there are only a couple that I feel a connection to and want to share here. These are the ones where Molly said, "OK, set up here and let's see what you come up with..." rather than directing me on setting up the shot. These are the ones, like the fountain above, where I saw the image I wanted and she just helped me make it better and get it right. These are my view. That realization - that beyond having a technically beautiful image, it needs to also be my image - is as important to me as the lessons on the technical details.

Today's photo of La Fontaine des Mers in Place de la Concorde is straight out of the camera, no editing. I find myself itching to crop it a little bit but in honor of my lessons from Molly I am leaving it as it is, because that's what I captured in the moment. A moment I want to remember and learn from, my night photo tour in Paris.

Tuesday, August 10, 2010

The Power of Photography

On our recent travels I've had the opportunity to see a number of photography exhibits. Some of these were planned visits, others I just happened upon, but they all show the power of photography in different ways. I love uncovering and discovering all of the different ways that photography can impact us, deepening our experience in the world around us.

In my visit to the Rosengart Collection in Lucerne, I had the opportunity to see the photos David Douglas Duncan took of Picasso. Duncan, a photojournalist, became friends with Picasso and captured some extraordinary images of ordinary moments in Picasso's life. The thing that struck me was the humor and zest for life that Picasso had, it just comes through in the images of him in his home, interacting with his family and his art. How powerful is that, to capture the artist that created the art, and to get a glimpse of the personality? It makes my understanding of Picasso and his work so much deeper. I don't have any pictures of the exhibit, but you can see many images of Picasso by Duncan on the web here.

As we explored the Swiss countryside around Gruyere, we stopped at the Musee Gruerien folk museum, where they just happened to have an exhibit of the photography of Emmanuel Gavillet, a modern Swiss photographer. The subject was Gastlosen - the Swiss "Rocky Mountains." All black and white, shot with an 8x10" film camera, the images were beautiful in their capture of contrast and texture. The display also showed some elements of the 8x10" camera, which were helpful to explain aperture and film to Brandon, who is fascinated by the workings of my camera and the idea of "film" is completely foreign to him. The images, printed large and on the wall, were powerful. They were images full of quiet grace, showing the timelessness of nature. A reminder that photographs are at their best when viewed large, they are truly art.

The city of Lausanne has one of the first museums in Europe dedicated to photography, the Musee de L'Elysee. The current exhibit is reGeneration2, an exhibition of 80 young photographers (in art school) from 30 countries in North America, Asia and Europe. I was struck by the sheer variety of it all... from people to architecture, from candid moments to studio, from black and white to color, from film photographs to digital collage, even shape (see round photos, in image shown above). Some of the photography I loved, some I didn't like, but it all reaffirmed my belief that we all have a unique vision to show the world. Art is personal, so for every person that doesn't like our art, there is someone who will. We need to keep showing our personal vision, developing our own style. Regain the irrepressible confidence of youth, the belief that you can do anything, that these photographers show.

While wandering the waterfront in Geneva, we ran into a photography exhibit called "Chernobyl: 25 Years After the Catastrophe." Powerful images from Guillame Briquet, showing the area surrounding Chernobyl today. He captured the decay of the human creations and the rebirth of nature left to itself, even in the wake of such a damaging event. What a contrast, against the backdrop of the festive carnival also happening along the lakefront. The most striking images for me were the ones that showed the evidence of lives interrupted. Just left behind. And the saddest part? It was too late for most of the people in the town of Pripyat to survive, since they were evacuated a full day after the accident because of the extreme radiation to which they were exposed.
This exhibit showed the power of photography to teach us about history, to remind us of events of the past and the longer term ramifications. To teach us about what the human ego can do, when left unchecked. Photography has the power to keep the world honest.

Finally, last weekend back in my home area of Milan, Italy I found the exhibit of Alberto Bortoluzzi's 24+1 Cinema Chairs Project. What a delightful find this was! Finding an old movie theater chair in the dump, Bortoluzzi was struck by the disappearance of these chairs for their cushy, higher tech cousins. He began wondering about the stories that old movie theater chairs might tell, and started to find and document these chairs. He then contacted filmmakers for their memories of the cinema and the result is a powerful essay on the history of film, through the images of these chairs and the words of the people who helped create the films. A first for me, I actually made a beeline to the bookstore and purchased the book of the project so that I could enjoy the images and stories at my leisure. Bortolozzi's work shows the power of photography, when paired with stories, to capture something greater than the image itself. To create something wonderful and new.

Photography is amazing, isn't it? We need to move it from the computer screen and onto the wall. We need to experience it larger than life, as a part of our physical environment. If you can, take the opportunity to go see an exhibit in person soon, and share what you learn! As for me, I think I'm going to figure out how to view some of my photos, live and in person.