



Showing posts with label Sicily. Show all posts

Wednesday, April 6, 2011

Exploring with a Camera: Waiting to Click

Exploring Patience in Photography 3


Welcome to Exploring with a Camera! This next couple of weeks we are going to be Waiting to Click. As always, I have a lot of ideas to share with you in this post and then there is a link up at the bottom for you to share your images on the topic. You can also share your photos in the Flickr pool if you are interested in being featured on the blog.

There is so much of our world that is changeable. When you tune in to it, you begin to notice the ebb and flow of life around us. "Waiting to Click" is about being aware of the changeable things in our environment, predicting what is going to happen and then waiting to capture the image we've anticipated. So often photographers talking about being ready, having the camera with us and available to shoot, in order to capture a fleeting moment as we see it unfold. Waiting to Click takes the readiness a bit further, adding a bit of both prediction and patience into the mix.

To get a great image by Waiting to Click requires your active participation. Here is what you have to do:
  1. Be aware of what is changeable in your environment. We live in a world of change, whether it's the flow of traffic or the clouds blowing by, there are variables that affect the potential for us to make good images. By noticing the things that are moving and changing, and how they change relative to the things that are fixed, we can make use of them in our photography.
  2. See the image you want to capture. You need to see the potential shot. This may mean looking through or past the changeable things in the environment, or predicting their behavior to include them in the image you want to capture. 
  3. Know your equipment. In order to take advantage of a changing situation, you have to know your camera. What is the delay between shutter press and release? What is the timing if you use burst? I know we are talking about fractions of a second here for dSLRs, but those fractions of a second may matter. For point-and-shoots or phone cameras, the delay is longer and you really have to be able to coordinate the pressing of the shutter with the prediction of the shot.
  4. Wait for the shot to unfold, then capture it. This is the key. This could mean waiting for several seconds, or it could mean waiting minutes. Professional photographers might wait all day for the perfect light to capture the image they see. How long you are willing to wait is up to you.
Now let's see a few examples of Waiting to Click, to further explain what I mean...

Moving Vehicles


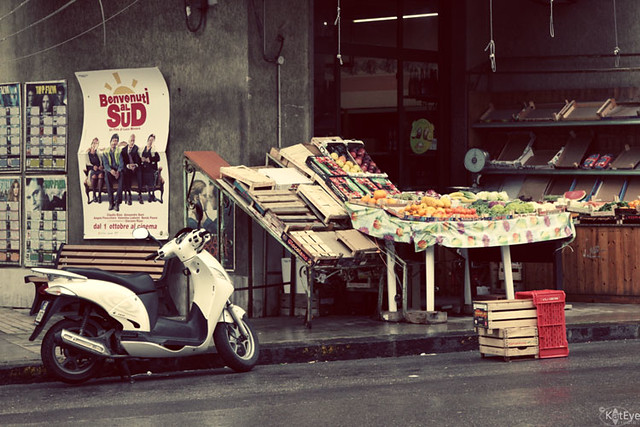
Vehicles of all sorts are always moving around us, when we are out and about in the streets. You may recognize the lead-in image for this post as another in my emerging market/wheels series, and the capture of this shot is a great example of Waiting to Click. I saw this image across a very busy street in Siracusa, Sicily. I paused for a while and watched the traffic flow. There were a few moments in each traffic light cycle, where the cars passing by on the street cleared out just long enough to photograph a few frames. While traffic was going by, I looked at possible angles and compositions, and situated myself in the best spot for the image I envisioned. I waited for the next traffic light cycle, and the moment the cars cleared out, I got the shot.

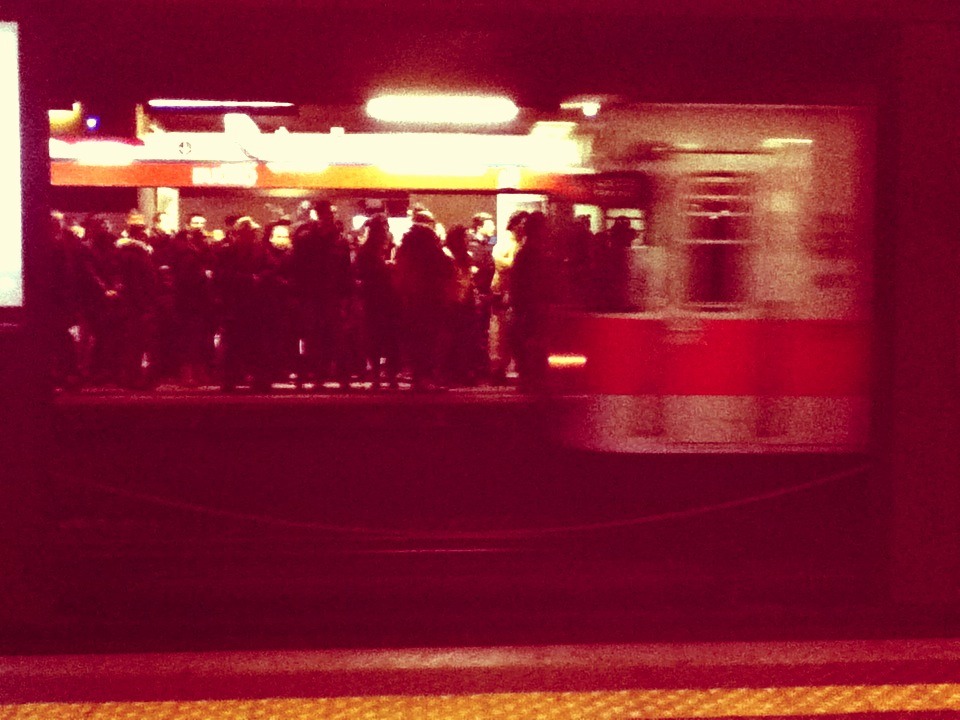
In some cases, you want the moving vehicle in the shot, like this one of the Milan subway I captured with my iPhone camera. This was my first outing with the camera, and I was just getting used to the delay. I was fascinated by the crowd on the other side of the subway platform and thought it would be a great shot to have the crowd behind the train pulling into the station, so I practiced with a couple of shots of the crowd to get the framing and camera timing down. Then, when I heard the train coming, I was ready to click as soon as it entered the frame and captured the image I wanted.

The light this particular evening in the Venetian Lagoon was spectacular. I took several images of the sky but knew the shot would be more interesting with a boat in the foreground. I had my exposure and composition dialed in, it was just a matter of waiting for the right opportunity to come along. When this boat came by, I was ready and waiting to click.


People


We are often surrounded by our fellow human beings, and depending on the shot you want, that can be a good thing or a bad thing. You might think that Europe is an empty place, from my photographs. I really love to capture an empty street or place, to allow the viewer room to imagine themselves in the frame. To do this, I often have to wait for a lull. Just like cars, the flow of people will change, but it's less predictable. Here is another in my market/wheels series, captured in Bologna. It looks like this was a deserted street, but this was a busy Saturday afternoon, the weather was nice, and people were out on the streets in force. I used the times when there were people coming by to set up the shot and play around with composition. When I found the image I wanted, I waited for the people to leave the frame, and clicked.


Here is another image where I waited for the frame to clear, with the exception of the people seated on the left. Evening at the Roman Baths in Bath, England is certainly quieter than the day, but there were still many people wandering around and listening to their audioguides. (I've learned to dislike audioguides - people stand immobile for minutes on end gazing at something while listening to the commentary, much longer than they do without the audioguide.) Meanwhile, I patiently waited for them to move on so I could get the right image. 


Often, your image will be enhanced with a person or two in just the right spot. The next two examples, from Cinque Terre and Bath, are images where the mood is further conveyed by the people in the frame. In both cases, I had to wait until the subjects walked into the right light to capture the image.


So far I've shown you empty or mostly empty places - what about crowds? I've learned quite a bit about photographing a crowd over the last couple of years. Capturing a crowd can convey the energy, the hustle and bustle of a place, but it has to be done right. In general, I've discovered that for a good crowd shot, you want to have full bodies - partial people walking into the frame or cutting off feet is distracting. For a generalized crowd, you also want the people to either be small enough their faces aren't easily distiguishable or facing away from the camera. Nothing attracts the human eye quite as much as a face, so your crowd shot can become an unintentional image of a specific person if you're not mindful. Here's a comparison of two images within moments of each other in Madrid. The first shot is one I would consider a nice crowd-in-the-street scene, the second has more crowd distractions.


Crowds ebb and flow, which is a great thing. Unless you are in an insanely crowded place (like Venice at Carnevale), you can usually situate yourself in a good location and wait for the crowd to disperse itself in a way that works for your intended image. This example from Venice (not during Carnevale) was one where I waited for a good crowd position before pressing the shutter.


The Natural Elements


So far I've talked about human elements, but natural elements - such as light and wind - are some of the more changeable features in our world. As photographers, we live for light, so being aware of the light you are working with and how it may change is an important skill. Partly cloudy and windy days can be great days for waiting to click.

The following set of images from Stonehenge show how just a few moments difference on a partly cloudy day can make a huge difference in an image. Watching the light, and waiting to click at the right moment, can pay off big dividends in your images.


You may remember this group of three image from Cascais, Portugal.  This another time when I waited for the right light to click. The sun was going in and out of the clouds, and without the dappled light this image was not the same. I waited for quite a while for the sun to come out from behind the clouds to capture this scene.


For the next example, it was the wind that made a difference. With wind, you sometimes have to wait for a gust or wait between gusts, depending on what you want to capture. In this image of the main street of Murten, Switzerland, I had to wait for the breeze to die down so that the flags were hanging straight and clearly visible. A subtle detail, but one that means the difference between you being able to tell the location by looking at the image or not.


I've shown you a lot of examples where my patience paid off, but also realize that waiting to click doesn't always work out. There are times when the elements don't change as you predicted. There are times when you can't wait as long as you like - the people you with are impatient or you have someplace to be at a certain time. But when you are aware of your environment, seeing the opportunities and waiting to click - sometimes magic happens. 

Wait for it...
Wait for it...
Click.


I can't wait to see the images you captured by Waiting to Click, new or archive shots are welcome. Link your images in below or put them in the Flick pool. If you have the opportunity to comment on how you set up the shot and waited to click, that would be fun to read. I would love it if you want to add my button to your post, you can find the code here.

Saturday, April 2, 2011

Following a Dream


I am musing today on transportation at Mortal Muses, with an image of--what else--a scooter! Click on over there to see a companion image to this one. The image posted there is my favorite of the two.

This lovely find was another in a back alley of Ortygia in Siracusa, Sicily. Ortygia was scooter heaven. Streets too narrow for cars and a chilly, off-and-on rainy day led to an emptiness that is perfect for my photography. I would have loved to study this scooter with my camera more, but just as I started shooting the owner came out and got ready to leave. I did ask him if I could photograph it for a moment, and he nicely stepped away so I could take one or two more photos (this is one). I showed him the images, thanked him and then let him go on his way.

It's probably no secret that I have a dream of owning a scooter, after living in Italy. I've taken one step toward that dream, by signing up for a Motorcycle Basic Rider Training course in mid-July after we move back to Oregon. I don't want to buy a scooter and then discover I hate it, so I'm going to take this course and get my bearings and hopefully my motorcycle license. I also don't want to let too much time go by, and let normal American life wipe out remembrance of my Italian scooter dream, so I've committed myself now. I'll let you know how it goes come July. :)

Switching gears... along the lines of my post yesterday on claiming your artist, I later read this post by Stephey Baker at Marked by the Muse. It seems she and I were on the same wavelength! If you resonated with my post yesterday, I encourage you to check out Stephey's article as well. Each little piece of information, each little insight will take you a step closer to claiming your artist. It you want to, you can do it.

Thursday, March 24, 2011

It's a Mystery


A dilapidated scooter, found in the back alleys of Ortygia. I wonder what happened? Why has this scooter been left here, to slowly decay? The tires are flat, the body is rusting and the seat is coming apart. There is a story here, what is it?

My mind jumps from the simple - the scooter stopped working and the owner couldn't afford to fix it - to the complex: The person who owned this scooter and lived in this building disappeared under mysterious circumstances and no one to this day wants to move it. The mystery could spawn a novel.

What story do you tell for this scooter?

I'm off this weekend to find the stories in the mosaics of Ravenna and the small country-within-a-country of San Marino. I'm sure there will be some groups of three waiting for me as well. Have a great weekend, I'll be back here on Monday.

Exploring with a Camera: Group of Three


Welcome to Exploring with a Camera Thursday! Today we are going to be exploring Groups of Three in photographic composition. At the end of the post there is a link up, for you to share your images using groups of three. If you want a chance for your image to be featured here on the blog next week, you can also place your photo in the Exploring with a Camera Flickr group. A big hello to Ashley Sisk's Scavenger Hunt Sunday participants - I'm always happy to have you joining me here!

A general principle of design, in decorating or any visual art, is to use odd numbers. A composition with odd numbers is pleasing to the eye. Why? In the Visual Composition article on Wikipedia, it states the "rule of odds" works "by framing the object of interest in an artwork with an even number of surrounding objects, it becomes more comforting to the eye, thus creates a feeling of ease and pleasure."

A group of three, versus a larger odd number, is fun to work with in photography. It is small enough that compositions are simple and uncluttered, yet also large enough to provide a lot of variation in how the group can be presented. I have found there are many ways that groups of three work compositionally. Let's take a look...

Basic Geometry


Going back the basics, three objects can be arranged to form one of two things: A line or a triangle. There are no other options. This is great from a compositional standpoint - we can use lines and triangles!  I did some experimenting last weekend with my origami cranes. No matter how I arranged them, they are either in a line or a triangle, but the creative possibilities are endless.


Taking three objects on a simple background and arranging them into different compositions as I did is a great exercise. You can really play around with the photographic possibilities found in groups of three.

Most of the time I'm photographing in the "real world" though, which means I'm capturing what is already there and choosing my composition solely by framing. In all cases, you will see it comes back to the basic geometry: lines and triangles. For my eye specifically, I use mostly lines.

Pointing out Differences


A group of three can be a great way to compare differences. In the lead-in image of this post, a pretty little scene discovered in Cascais, Portugal, the orange buckets are flanked by the two candle holders. Even though the candle holders are different colors, the similarity of shape and size of the candle holders serves to highlight the difference of the stack of buckets. This image also has a group of three within a group of three with the stack of buckets, but you don't notice the stack (which are similar) as much as you notice the buckets (which are different).

This image of mailboxes on a wall in Sicracusa, Sicily highlights differences in the group of three. They are all post boxes, yet the interest is that they are all different. Being slightly out of line on that fantastically textured wall adds interest too. (I also noticed the colors are the Italian Tricolore - go back and take a look at the images in that post again with an eye to groups of three.)


These lockers are framed as a group of three, but the repetition of the pink lockers serves to highlight the differences in the locks. Notice all of the lines - the locker outlines, the row of handles, and the contrasting diagonal line formed by the ever-smaller locks.


Using Similarities


Even while a group of three may be useful to highlight differences, using similarities in a group can get you to pleasing composition.  For these paperweights of Murano glass from Venice, the group of three forms a line to bring your eye to the focal point. Since the paperweights are all similar in color and shape, they don't distract the eye.


I love this image of flower pots on the steps in Varenna, Italy. The pots are similar in color and shape, and form a line that contrasts nicely with the lines of the stairs. The contrast in color along with the intersection of lines draws the eye to look closer at the pots, where you begin to notice the subtle differences in their shape and size. 


This image from Mt. Etna in Sicily uses the similarity of the tree silhouettes to catch your eye. Since there is no "obvious" tree of the three, you begin to see the subtle detail of the landscape illuminated behind as you look closer. I love images that hold layers of detail in them like these trees and the flower pots above. Groups of three seem to be a good way to initially pull a viewer in, where they remain to explore the multiple layers.


Groups of three are also great for highlighting architectural details and spaces. In this image of the Roman Bath in Bath, England, a composition of three openings serves to highlight the structural design of the baths. You notice the details that repeat multiple times - pillars, torches, archways. The reflection only serves to emphasize the group of three and the details further.


Clustered vs. Spread


In preparing for this topic, I've noticed that my images with groups of three usually have the objects in the group spaced evenly. These prehistoric pots from the Orsa archeological museum in Siracusa are a good example. Even though they are presented front-to-back rather than side-to-side as many of the images above, there is still an impression of even spacing and they are spread to fill the image.


This example of architectural details in a stone wall is from Bologna. By their design, the blocks are evenly spaced. By presenting them as a group of three in a diminishing line spread across the frame, the repetition of the blocks and carvings is shown while highlighting the detail of the single carving in focus.


Even though I don't seem to use them often, groups of three work fantastic in clusters. I have a classic interior design image in my head: Three vases of varying sizes clustered together on a mantlepiece. In a cluster, a group of three becomes a unique object of its own. The group is the object. In the image below, the subject is "art for sale" and the group of three paintings illuminated form that subject.


As you review the images in your archive, take new images or just go about your daily life these next couple of weeks, notice groups of three. Are they found clustered or evenly spaced? Do you see the groups in lines or triangles most often? Are they used to highlight similarities or differences? How else can you see to use groups of three in your compositions?

I can't wait to see what you find, I always learn something new when we explore together. Link your images in below or share them in the Flickr pool. The link tool will remain open through April 5. Have fun exploring!


Monday, March 21, 2011

Back Alley Bliss


Oh, scooters. How I love thee. Wandering the back alleys of an old city, finding a vintage scooter amongst the texture and filtered light has become heaven to me. Do I see scooters because I love to photograph them, or do I love to photograph scooters because I see them? That is the question. Much simpler than Hamlet's "to be or not to be" and, to be honest, I really don't require an answer. I'm happy to both see them and photograph them, regardless of the priority order.

This lovely find was in Ortygia, the old quarter of the town of Siracusa in Sicily. We got lost in the back alleys trying to find the duomo, and it was scooter heaven for me this day. I'll have several to share over time.

I've learned that is my favorite thing to do when traveling... wander. Just wander the back streets and alleys, away from the shopping zones. I don't need long, just an hour or two. I can guarantee I'll find interesting things to photograph when we just wander.

How about you? Where are you guaranteed to find creative inspiration?

Sunday, March 13, 2011

My Day in the Sun


This image holds such a warm memory for me. As I shared the other day, I woke up before dawn this morning and watched the sunrise. I loved how the sun spilled over the edge of the mountains and clouds, and was happy to be able to capture the moment. It was such a warm morning, I sat out on the balcony in the sun and wrote my answers for Diana Mulder's interview series "Women Who Create Beautiful Things" which is posted on her site today. You can read about how I ended up in Italy, found my passion for photography, and what's coming next for me.

It was a great experience to do this interview! I was nervous at first to put myself out there in this new way, but answering the questions helped me look at my story from a new perspective. Since I have enjoyed Diana's art and her blog for nearly a year, I felt as if I was talking directly to her as I wrote.

Diana and I met during Kellie Rae Robert's Flying Lessons course last summer, and connected to each other's art immediately. Early on, she had looked at the photographs on my blog and asked me if she could paint this image of my son Brandon on the Oregon Coast.


I had forgotten about it until Diana sent me the list of questions for the interview, and attached her mixed media version of this image. I love what she did with it! She created a wonderful interpretation with the addition of the red and brighter colors. I also love that this painting links our art together, gives us a connection we wouldn't have had otherwise. This is how artists inspire each other!


I hope you visit Diana's blog to read the interview, and then stay a while to look around at her wonderful art! 

Friday, March 11, 2011

The Power of Nature


It's hard to believe that a little over one week ago we stood on an active volcano. Located in Sicily, Mt. Etna is the largest active volcano in Europe. We rode the gondola up on the south side, stood in the snow as the locals skied down the hill, and ogled the peak puffing away. We marveled, "We're on an active volcano!"

It was a beautiful day, as the blue skies attest (no color enhancement to these photos). It would be hard to believe that it could change in an instant, but you can't predict nature. On the north side of Etna you can see the most recent lava flows below the smoking peaks.


As I hear the reports and see the videos of the Japan earthquakes and tsunami, I am rendered speechless. In the face of nature's power, we are helpless. We are mere passengers on this ball of rock hurtling through space. The earth continues to re-shape itself as it will, regardless of how the humans on the surface try to monitor, predict or even control it. We easily forget that in our everyday lives.

My heart and support goes out to those struggling with the aftermath of this natural disaster in Japan.

Thursday, March 10, 2011

Exploring with a Camera: Square Format

Composed
Happy Thursday! Welcome to Exploring with a Camera day, my favorite day of the week. Today we're going to learn about composing with a Square Format. At the end of the post there is a link up, for you to share your images using a square format. If you want a chance for your Square Format image to be featured here on the blog next week, you can also place your photo in the Exploring with a Camera Flickr group.

I got the idea for playing around with Square Format from the book 150 Photographic Projects for Art Students by John Easterby. I haven't used this format before, so I picked up another book that has become my "encyclopedia" for composition, The Photographer's Eye by Michael Freeman, and looked at the traditional compositions for a square format. With a little bit of information in my head to guide my eye, I was off and exploring Square Format.

Let's see what I learned...

Getting it Square

Unless your main camera is your cell phone, chances are you don't have a square format camera. The typical frame format for digital SLR cameras is 3:2. This means that the length is longer than the height of the frame by one third. A standard size in this format is a 4x6 print. For point-and-shoot cameras the typical frame format is 4:3, where the length is longer than the height by only one quarter. It is closer to square but still not quite the same.

The first step of this exercise is getting a square format. You can always crop the photo into a square format in post-processing. This can teach you a lot, but it doesn't help you to play around with composition at the time of taking the photo so you can make real-time corrections.

What the 150 Photographic Projects book suggests is creating a "pseudo" square format camera by blocking off part of the LCD screen so that you view only a square. Since I intensely dislike using the "live view" mode for composing with the LCD on my dSLR, I decided to modify my point-and-shoot camera (aka my "little camera"). This turned out great, because I was able to leave my little camera in this format for several weeks, even taking it on our vacation to Sicily, while not interfering with my normal photographic process using my primary dSLR camera.

To modify the LCD screen, I just taped a piece of computer paper over the LCD screen as shown below. I used computer paper because I wanted to have a similar color to the rest of the camera, to give a visually consistent border on the frame. Computer paper was not thick enough to block the light coming through the LCD, so I slipped a small piece of dark cardstock behind the taped computer paper and it worked beautifully.


I keep my camera set on center spot for focusing, so I just focus and recomposed as needed, like I do normally. With this minor modification, I was ready to go. My 9-year-old son, observing this little exercise, would occasionally take his camera and put a finger over the edge of the LCD as he composed saying, "Square Format!" In a pinch, that works too!

What follows are some of the compositions I explored. You'll see a caption below each photo. "Cropped" means that the photo was created using the standard format frame for the camera and then a square format composition was explored using cropping in post-processing. "Composed" means that the photo was composed using my modified-LCD-screen as shown above. I still had to crop in post-processing to make the image a true square format, but the composition was decided in-camera.

Random


With the even sides, a square format is very static. This makes it a good candidate for "random" composition, where the eye takes in the whole at one time. This image of oranges on the tree from Sorrento was a good candidate for square format. There wasn't a clear "focal point" with these oranges, it was more about the light,  shape and color of them on the tree.

Cropped
Another image I would consider to have random composition is this mountain scene from the Alps just north of where we live. There is no clear focal point in this image either, it is of the scene - sun, mountains, light, shadow - and square format works well. I actually needed to crop this one, since there was part of someone's head on the right hand side. I was in line for the gondola down the mountain and couldn't get a full frame image unobstructed. A square format crop allowed me to make this image something useful rather than throw it away.

Cropped
Concentric


With it's even sides, square format provides the unique opportunity to nest a circle in the square. Coming across a pretty door in Cefalù, Sicily, I captured one of the elements carved in wood using square format.

Composed
This door design from Erice, Sicily, captures another circle in the square. This falls into both the concentric and centered composition categories.

Composed
What other circles can you think of that would be great to capture in square format? Flowers, something like a Gerbera daisy, come to my mind.

Centered

With square format, you can get a good effect with centering your focal point, something that doesn't work as well in rectangular formats.  This best capture of this window in Venice using square format was centered.

Composed
The ancient Greek Temple of Concord, found in the Valley of the Temples in Sicily, is front and center in this image. It's all about the temple here!

Composed
With square format, you can also put the horizon on the center line with good effect, unlike a rectangular format. I saw some great examples of this by American photographer Harry Callahan when I visited an exhibit of his work in Paris. Here is one of his images as an example.

Photo by Harry Callahan
Diagonal


Just like in rectangular format, diagonal lines can be very interesting compositions. The image below of Murano glass displayed in Venice is an example of both diagonal and centered composition. The thing I noticed when playing around with cropping diagonal images is that you need a different angle on the diagonal line to work in square format. If an image was composed with a diagonal line for a rectangular format, there is a good chance it is at a wrong angle to just crop into square format. In the case of this image, I had played around with different angles and happened to have one that worked for square format.

Cropped
Off-Centered


With more rectangular subjects, I found that the subject needed to be off-center using square format. A centered image works with a square or circular subject, but not so well for a person or a tree. Cropping this self-portrait of me in Venice solved the problem of too much wall on either side. Normally, I would have taken this in a vertical orientation, but you can't really do that when you set your camera on a step. Square format solved my composition problem.

Cropped
The tree-in-the-field image below from Parco di Monza is influenced by the Rule of Thirds. It works with square format too!

Composed
Balance


Ultimately, what it all comes down to in any composition, regardless of format, is balance. The elements have to be balanced within the frame for a pleasing image. The lead-in image, another scene from the town of Cefalù, Sicily, is a good example of a square format image that doesn't follow any of the specific compositions described above, but balances the elements of color and shape into an interesting photo.

This balcony with the interesting ceramic pots in Taormina, Sicily was another square format image where the composition was derived by balancing the elements of color and line.

Composed
So, how about you, do you have any experience with square format? If not, I encourage you to explore along with me here. Go through your archive and see if there are any images where a square format crop would work well. Modify your camera for a few days to create a "square format" and see what you find. Come back here to link in and share your findings with the rest of us. It will be interesting to see all of the takes on square format that you link in for this theme!

Tuesday, March 8, 2011

The Calm Before Dawn


I am an early riser. This becomes very apparent when we are on vacation and the alarms are turned off, yet I wake well before the rest of my family. This morning on our recent trip, I woke to see the sky beginning to lighten, and decided to get up to watch the dawn from the balcony of our room on the Tyrrhenian coast of Sicily. I watched as the clouds began to glow and the fishing vessels came out to start their work day. This boat did an interesting circle before moving on, can you see the remains of the wake? Such a calm and peaceful moment, it fills me with quiet joy even today. I hope it does the same for you!

The Exploring with a Camera: Capture the Sky link closed this morning. Have you seen the amazing images that were shared? If not, I encourage you to take a look at this link up and see the wonderful interpretations for Capture the Sky. They were breathtaking. I so enjoyed this theme, and greatly appreciate the wonderful participation from all of you.

Tomorrow will be a new Exploring with a Camera, come back for an exploration of photos in Square Format. See you then!

Sunday, March 6, 2011

Vacation or Travel?


Today I share with you one of the last images of our week in Sicily. Not because it's one of the best images, but because I need to hold on to this moment just for a little bit longer. This was my view yesterday morning as I sat on the balcony of our hotel room in Taormina. I sat, reading in the sun, as my family lay sleeping inside the room. During these few beautiful moments in the sun as I looked out over the Ionian Sea, I finally got it - the difference between vacation and travel. I finally got why someone would go visit a place with a beach for a whole week without moving. Just sitting in the sun and reading.

You see, we've spent almost the last two years Traveling. Travel, by my definition, is where you go visit someplace new with an intent to see as much as possible. Learn. Move. See more. You pack as much as possible in to your visit, because you will never get to this place again. Life is too short, there is too much to see in the world. We've always travelled this way, even around the US, before living in Italy.

Vacation, by my new definition, is where you sit back and relax. You experience where you are visiting by easing into it. You do see new things, but you give yourself time to enjoy the moment. Sit in the sun on the balcony, if that's what you need. You listen to your body, come back refreshed instead of worn out.

How about you - do you travel or do you vacation?

Slowly, slowly over the last year we've changed our style from our earlier frenetic traveling to vacationing. Instead of moving hotels every one to two days, we stay in one place longer. Moving no more than one or two places in a week. We opt for the "view" room if we can, to give us a place we enjoy staying "in" if that's what we need. We check in with ourselves, and if we don't feel like visiting one more Roman ruin or Medieval town, we don't. Sometimes you just need to sit in a piazza and eat gelato. Or sit on the balcony and read.

We had a wonderful visit to Sicily, you'll see the photos in the coming days. We slowed down and enjoyed our moments - rainy or sunny.. Maybe this is what the whole "Slow Travel" movement is about, I'll have to look into it now. In the meantime, I'm going to gaze at this picture and remember these last few moments in the sun for a bit longer...